5/24/2014

Implementing Transactions in SQL Server – Part II

BY 

One of the regular tasks of a DBA is to generate database schema change scripts, and then deploy the scripts to SQL databases. If an organization is not using a third-party tool, as is common, then Database Professional (which is part of Visual Studio from Microsoft) is normally used to accomplish this task. In many companies, the process of generating schema change scripts is a daily routine. Create DB scripts are generated on from TFS, a schema compare is performed between the previous and the latest build, and the schema update script is generated. The only issue is they do not run as a single transaction. The reason is that the scripts that are generated do not have explicit transactions defined. Unfortunately it is not simply a matter of defining a transaction using BEGIN TRANSACTION, and based on the @@TRANCOUNT variable in the end of the script either perform a Rollback or a Commit. This is due to the fact that after every DDL statement, DBPro inserts a GO statement, causing each statement to run as a batch, and explicit transactions do not span multiple batches. A sample script that is generated by DBPro would be similar to this:
PRINT N'Creating [dbo].[test1]'
GO
CREATE TABLE [dbo].[Test1]
(
[Col1] [bigint] NOT NULL IDENTITY(1, 1),
[Col2] [int] NOT NULL,
[Col3] [varchar] (50) NOT NULL,
[Col4] [varchar] (50) NOT NULL
)
GO
PRINT N'Creating primary key [PK_Test1] on [dbo].[Test1]'
GO
ALTER TABLE [dbo].[Test1] ADD CONSTRAINT [PK_Test1] PRIMARY KEY CLUSTERED  ([Col1])
GO
PRINT N'Creating [dbo].[usp_SP1]'
GO
CREATE PROCEDURE [dbo].[usp_SP1]
AS
…..
ALTER TABLE [dbo].[Test2] ADD [Col1] VarChar(100)NULL
GO
If there are no syntax errors in any of the DDL statements, then all the statements will run successfully. If, however, any of the statements results in an error then we have issues. Let’s say, the sample script above fails at the following statement because the table dbo.Test2 doesn’t yet exist on the database:
ALTER
TABLE [dbo].[Test2]
ADD [Col1] VarChar(100)NULL
GO
In this case, all the statements before this statement in the script would have run successfully, and committed the schema changes on the database, and the remaining statements after this statement including this one will not update the database leaving it in an unstable state. One solution is to fix this statement and run only the remainder of the script. This is a manual step, and is fine if scripts are deployed manually to the database. But what if there are a series of scripts being deployed at a time using an automated process?
There are several options to address this:
Option 1 : Remove all the GO statements from the scripts and then wrap the entire script within a single explicit Transaction. This involves manually editing the files which may not be feasible if the files are very large in size with numerous GO statements.
Option 2 : Implement transactions. Didn’t I mention earlier it is not possible because of the GO statements? Actually it is possible with a little bit of tweak, and the use of a SET option in the script. In SQL Server, there is a SET option called SET XACT_ABORT. This option specifies whether SQL Server automatically terminates and rolls back a Transaction if a T-SQL statement raises a runtime error. The default option is OFF. But, if it is set to ON, the entire transaction is terminated and rolled back.
To avail of this the above above sample script can be rewritten as below:
:On Error Exit
SET XACT_ABORT ON
GO
Begin Transaction
      PRINT N'Creating [dbo].[test1]'
      GO
      CREATE TABLE [dbo].[Test1]
      (
      [Col1] [bigint] NOT NULL IDENTITY(1, 1),
      [Col2] [int] NOT NULL,
      [Col3] [varchar] (50) NOT NULL,
      [Col4] [varchar] (50) NOT NULL
      )
      GO
      PRINT N'Creating primary key [PK_Test1] on [dbo].[Test1]'
      GO
      ALTER TABLE [dbo].[Test1] ADD CONSTRAINT [PK_Test1] PRIMARY KEY CLUSTERED  ([Col1])
      GO
      PRINT N'Creating [dbo].[usp_SP1]'
      GO
      CREATE PROCEDURE [dbo].[usp_SP1]
      AS
      …..
      ALTER TABLE [dbo].[Test2] ADD [Col1] VarChar(100)NULL
      GO
If Xact_State()=1
Begin
      Print 'Committing Tranaction...'
      Commit tran
End
Else If Xact_State()=-1
Begin
      Print 'Rolling Back Transaction...'
      RollBack Tran
End
Please note the first four lines and the last ten lines in the script.

:On Error Exit
This command causes sqlcmd to exit the sql script upon encountering an error.

SET
XACT_ABORT ON
With this statement, if a Transact-SQL statement raises a run-time error, the entire transaction is terminated and rolled back.

Transactions in SQL Server Part I – An Introduction

BY 

A basic requirements in most SQL Server based applications is implementing a database operation (DDL or DML) in a single unit of work. The DDL requirement is more from a DBA’s perspective rather than the application, since any application would perform only INSERTs, UPDATEs and DELETEs on the existing data, and a DBA would be performing DDL statements on the existing database as part of schema updates. The default behavior of SQL Server is to implement implicit transactions, meaning every T-SQL Statement is committed as soon as it is executed. This works fine as long as there is only one query being executed. But this is seldom the reality in large applications.

Enterprise applications normally entail executing large transactions, ie. a large number of T-SQL statements to be executed as a single unit of work. This means, either all the statements run successfully or they all need to be rolled back. This is also one of the ACID properties of transactions – Atomic. This ensures that the state of the database is stable even in case of failure, and any subsequent operation can be performed gracefully. The implementation of these transactions becomes important in any multi-tier application where the user interface makes a call to the database in response to user actions. In the first part of this article, I will discuss the basics of SQL Server Transactions from a beginner developer’s perspective. Below is an example of how to define an explicit transaction:
BEGIN TRANSACTION;
BEGIN TRY
--  T-SQL Statements
END TRY
BEGIN CATCH
-- error catching SQL
    IF @@TRANCOUNT > 0
        ROLLBACK TRANSACTION;
END CATCH;
IF @@TRANCOUNT > 0
    COMMIT TRANSACTION;
GO
The first statement in this example is BEGIN TRANSACTION. This statement marks the beginning of an explicit transaction. Beginning with SQL Server 2005 onwards, a new block of T-SQL statements called BEGIN TRY… END TRY and BEGIN CATCH… END CATCH was introduced. These blocks make it easy for error handling. The main block, BEGIN TR… END TRY contains the statements to be executed. BEGIN CATCH… END CATCH is the error handling portion of the construct.
The BEGIN TRANSACTION statement marks the beginning of an explicit transaction. This statement should be the first statement in any block of code (Stored Procedure, Function). The BEGIN TRY… END TRY defines a block of code where the actual T-SQL Statements go. If all the statements within this block run successfully, then control is transferred to the first statement after the BEGIN CATCH… END CATCH block. If, however, any of the statements results in an error, then control is transferred to the BEGIN CATCH… END CATCH block.
Since we have defined an explicit transaction, we need to either roll it back, or commit it. The Rollback would occur in the BEGIN CATCH… END CATCH block. The Commit should be immediately after this block. The statement that rolls back a transaction is ROLLBACK TRANSACTION, and the statement that commits is COMMIT TRANSACTION.
In the example code above, I have checked for the value of the system variable @@TRANCOUNT before taking a decision of rolling back or committing a transaction. This variable indicates whether there are any transactions open in the current session, and if yes, we need to do something about them. Therefore, in the BEGIN CATCH..END CATCH block, if the value of the @@TRANCOUNT variable is greater than 0, it means we need to roll back the transaction because since control was transferred to this block when errors were encountered in the BEGIN TRY..END TRY block of statements.
Similarly, after the BEGIN CATCH..END CATCH block, we need to check the @@TRANCOUNT variable to determine if there are any transactions open, and these will need to be committed them when no errors were encountered in the BEGIN TRY block.
This is a very basic demonstration of the use of SQL Server Transactions which should be implemented in stored procedures and functions that are the basic blocks of T-SQL code, and form the backbone of any transaction based application. In the next article, I will discuss more advanced topics related to using and implementing transactions.

1/05/2014

New Features in ASP.NET Web API 2

Ref: http://weblogs.asp.net/dwahlin/archive/2013/11/11/new-features-in-asp-net-web-api-2-part-i.aspx

Attribute Routing

Routing has been a core feature of Web API since it’s initial release and something that’s built into new Web API projects out-of-the-box. However, there are a few scenarios where defining routes can be challenging such as nested routes (more on that in a moment) and any situation where a lot of custom routes have to be defined. For this example, let’s assume that you’d like to define the following nested route:

/customers/1/orders

This type of route would select a customer with an Id of 1 and then return all of their orders. Defining this type of route in the standard WebApiConfig class is certainly possible, but it isn’t the easiest thing to do for people who don’t understand routing well. Here’s an example of how the route shown above could be defined:

public static class WebApiConfig
{
    public static void Register(HttpConfiguration config)
    {
        config.Routes.MapHttpRoute(
            name: "CustomerOrdersApiGet",
            routeTemplate: "api/customers/{custID}/orders",
            defaults: new { custID = 0, controller = "Customers", action = "Orders" }
        );

        config.Routes.MapHttpRoute(
            name: "DefaultApi",
            routeTemplate: "api/{controller}/{id}",
            defaults: new { id = RouteParameter.Optional }
        );

        GlobalConfiguration.Configuration.Formatters.Insert(0, new JsonpFormatter());
    }
}

With attribute based routing, defining these types of nested routes is greatly simplified. To get started you first need to make a call to the new MapHttpAttributeRoutes() method in the standard WebApiConfig class (or a custom class that you may have created that defines your routes) as shown next:

public static class WebApiConfig
{
    public static void Register(HttpConfiguration config)
    {

        // Allow for attribute based routes
        config.MapHttpAttributeRoutes();

        config.Routes.MapHttpRoute(
            name: "DefaultApi",
            routeTemplate: "api/{controller}/{id}",
            defaults: new { id = RouteParameter.Optional }
        );
    }
}

Once attribute based routes are configured, you can apply the Route attribute to one or more controller actions. Here’s an example:

[HttpGet]
[Route("customers/{custId:int}/orders")]
public List<Order> Orders(int custId)
{
    var orders = _Repository.GetOrders(custId);
    if (orders == null)
    {
        throw new HttpResponseException(new HttpResponseMessage(HttpStatusCode.NotFound));
    }
    return orders;
}

This example maps the custId route parameter to the custId parameter in the Orders() method and also ensures that the route parameter is typed as an integer. The Orders() method can be called using the following route:

/customers/2/orders

While this is extremely easy to use and gets the job done, it doesn’t include the default “api” string on the front of the route that you might be used to seeing. You could add “api” in front of the route and make it “api/customers/{custId:int}/orders” but then you’d have to repeat that across other attribute-based routes as well. To simply this type of task you can add the RoutePrefix attribute above the controller class as shown next so that “api” (or whatever the custom starting point of your route is) is applied to all attribute routes:

[RoutePrefix("api")]
public class CustomersController : ApiController
{
    [HttpGet]
    [Route("customers/{custId:int}/orders")]
    public List<Order> Orders(int custId)
    {
        var orders = _Repository.GetOrders(custId);
        if (orders == null)
        {
            throw new HttpResponseException(new HttpResponseMessage(HttpStatusCode.NotFound));
        }
        return orders;
    }
}

There’s much more that you can do with attribute-based routing in ASP.NET. Check out the following post by Mike Wasson for more details.

Returning Responses with IHttpActionResult 

The first version of Web API provided a way to return custom HttpResponseMessage objects which were pretty easy to use overall. However, Web API 2 now wraps some of the functionality available in version 1 to simplify the process even more.
A new interface named IHttpActionResult (similar to ActionResult in ASP.NET MVC) has been introduced which can be used as the return type for Web API controller actions. To return a custom response you can use new helper methods exposed through ApiController such as:
  • Ok
  • NotFound
  • Exception
  • Unauthorized
  • BadRequest
  • Conflict
  • Redirect
  • InvalidModelState
Here’s an example of how IHttpActionResult and the helper methods can be used to cleanup code. This is the typical way to return a custom HTTP response in version 1:

public HttpResponseMessage Delete(int id)
{
    var status = _Repository.DeleteCustomer(id);
    if (status)
    {
        return new HttpResponseMessage(HttpStatusCode.OK);
    }
    else
    {
        throw new HttpResponseException(HttpStatusCode.NotFound);
    }
}

With version 2 we can replace HttpResponseMessage with IHttpActionResult and simplify the code quite a bit:

public IHttpActionResult Delete(int id)
{
    var status = _Repository.DeleteCustomer(id);
    if (status)
    {
        //return new HttpResponseMessage(HttpStatusCode.OK);
        return Ok();
    }
    else
    {
        //throw new HttpResponseException(HttpStatusCode.NotFound);
        return NotFound();
    }
}

You can also cleanup post (insert) operations as well using the helper methods. Here’s a version 1 post action:

public HttpResponseMessage Post([FromBody]Customer cust)
{
    var newCust = _Repository.InsertCustomer(cust);
    if (newCust != null)
    {
        var msg = new HttpResponseMessage(HttpStatusCode.Created);
        msg.Headers.Location = new Uri(Request.RequestUri + newCust.ID.ToString());
        return msg;
    }
    else
    {
        throw new HttpResponseException(HttpStatusCode.Conflict);
    }
}

This is what the code looks like in version 2:

public IHttpActionResult Post([FromBody]Customer cust)
{
    var newCust = _Repository.InsertCustomer(cust);
    if (newCust != null)
    {
        return Created<Customer>(Request.RequestUri + newCust.ID.ToString(), newCust);
    }
    else
    {
        return Conflict();
    }
}

More details on IHttpActionResult and the different helper methods provided by the ApiController base class can be found here.

Conclusion 

Although there are several additional features available in Web API 2 that I could cover (CORS supportfor example), this post focused on two of my favorites features. If you have .NET 4.5 available then I definitely recommend checking the new features out. Additional articles that cover features in ASP.NET Web API 2 can be found here

2/10/2013

ASP.NET MVC 4 Highlights: Bundling and Minification

By: John V. Petersen


In the first installment of this series, I explored a few of the new features in ASP.NET MVC 4, including the new default project templates, mobile templates, and display modes. Since that article, ASP.NET MVC 4 has been released to beta. For brevity’s sake, when I refer to MVC the design pattern, I’m referring to the ASP.NET implementation of the pattern. In this installment, I’m going to focus on one of MVC’s most useful features: integrated JavaScript and CSS bundling and minification.
One of the most important considerations in any Web application is the size of the content rendered to the browser. Bundling and minification handle two important tasks. First, all of the disparate JavaScript and CSS files are combined into one or more files. Second, the JavaScript and CSS code is minified by means of removing all of the carriage returns and line feeds as well as verbose variable names in favor of shorter (less verbose) alternatives.
With bundling, there are fewer resources that need to be rendered to the browser. With minification, the size of such resources is much smaller, often by as much as 70% or more!
These are not new concepts. Tools like JSMin and YUI have been around for several years. You have always been able to incorporate these bundling and minification solutions. What’s new are the integrated features baked into the MVC framework that handle these bundling and minification tasks out of the box.
Bundling and Minification “Out of the Box”
Figure 1 illustrates what you get out of the box for bundling and minification. Like all ASP.NET applications, everything starts in the Global.asax Application_Start() event handling code.
Click for a larger version of this image.

Figure 1: These code windows represent the out-of-the-box bundling and minification implementation in Global.asax and _Layout.cshtml.

In that code, there’s a call to:
BundleTable.Bundles.RegisterTemplateBundles();
The code for this method is burned into the System.Web.Optimization.dll. Figure 2 illustrates what that code looks like.
Click for a larger version of this image.

Figure 2: This code represents the out-of-the-box implementation code for RegisterTemplateBundles in System.Web.Optimization.

The code is straightforward in that bundles are created and files are added to the bundles. There are two ways to add files. One way is to refer to the file specifically. The second way is to specify a directory along with a file pattern search string. In the second method, the code can selectively traverse subdirectories to add content.
Each method has their respective pros and cons. When you specify the files, you know exactly what is getting into your bundled and minified files. This method requires more code. When you add directories, you don’t have to write as much code, but the possibility exists for unwanted code in the bundled and minified file. Choosing between adding files, directories or some combinatin thereof is a matter personal preference.
To use this functionality, there are a few concepts you must be familiar with:
  • Bundle Class: Encapsulates one or more files to be bundled and minified
  • AddFile() Method: Adds a specifically named file to the bundle
  • AddDirectory() Method: Adds files that match a file search string within the specified directory
  • Transform Property: An instance of IBundlerTransform, the object in this property performs the minification task
  • Path Property: The string that identifies the bundle within the Bundles Member in BundleTables
As you will see in a moment, as is custom in MVC, if you don’t like the default out of the box functionality in MVC, you can substitute your own functionality. First, take a look at what the default functionality gives you. Figure 3 illustrates how the disparate javaScript (JS) and Cascading Style Sheet (CSS) files are rendered to the browser.
Click for a larger version of this image.

Figure 3: The network view lists the bundled and minified CSS and JS files (with a query string parameter that is explained in the next section).

Note the file paths:
/Content/css/Content/themes/base/css/Scripts/js
These are the paths specified when the bundles were created. Figure 4 illustrates how the minified JavaScript appears.
Click for a larger version of this image.

Figure 4: This is the minified and bundled JavaScript content as rendered to the browser.

Why Is a Query String Parameter Added to the JavaScript and CSS Files?
Every time the page is refreshed, the server-side code is executed, causing the _Layout.cshtml Razor Template to evaluate. You always want the client to recognize the latest JavaScript and CSS content. If the file were always named the same, the browser may reference its cache. This behavior can always be configured at the browser level. However, that is not usually a feasible solution because it requires each computer to be specifically configured. If you have the chance to control behaviors that are essential to your applications at the server level, take it! With the addition of the query string, the client will interpret this to be a new file and therefore, rely on its cache.
You might be thinking that the call to ResolveBundleUrl is required for the bundling and minification to work. It’s not. To illustrate, I’ll replace the code for /Content/css with the following:
<link href="~/Content/css" rel="stylesheet" type="text/css" />
Figure 5 illustrates that bundling and minification still takes place. The only difference is the file name. Without the call to ResolveBundleUrl, the query string parameter is not added.
Click for a larger version of this image.

Figure 5: If the ResolveBundleUrl call is omitted, a query string parameter will not be added.

Essentially, that’s it! That’s what we get for free. But what about debugging? I don’t want my code minified in those cases. Am I stuck?
Of course not! In MVC, with almost no exception, you can override the default out-of-the-box behavior for your own behavior. In the next section, you will see how to create your own custom bundler and minification class.

Creating a Custom Bundler
If there are limitations to how the bundling and minification feature is implemented in the beta, these two would be at the top of the list:
  • The code to create the bundles is burned in a dll.
  • There is no way to make the default functionality sensitive to debug vs. release modes.
While bundling is something you probably always want, minification isn’t. While debugging, you need the unminified code to be rendered. Out of the box, using the default bundler, you cannot conditionally bundle. Let’s solve that problem now. The custom bundler code in Listing 1 solves the problem.
What’s the Second Bool Variable in AddFile()?
The second Bool Variable is the throwIfNotExist parameter. If the specified file does not exist, you can elect to have an exception thrown. In the default beta implementation, this parameter is set to false.
If you don’t want to be explicit with your files, the code could be simplified to what is illustrated in Listing 2.
The AddDirectory() method has four parameters:
  • directoryVirtualPath: the root directory used to search for files to bundle and minify
  • searchPattern: specifies the pattern to limit which files are included in the bundle
  • searchSubDirectories: if true, the process recursively searches all contained subdirectories under the directoryVirtualPath
  • throwIfNotExist: if true, the process throws an exception if the specified directoryVirtualPath does not exist
In this simplified code, every js file under /Scripts and every CSS file under /Content is included.
In both cases, a compiler directive is added to specify the transformer used to drive the minification process. Out of the box, there is a class called NoTransform. As the name implies, this class does not minify. You need such a class because the bundler instance requires a transformer:
var bundle = new Bundle("~/Scripts/js", jstransformer);
The bundler does not care what the transformer does. As long as it gets an instance that conforms to IBundleTransformer, the Bundle instance will be happy. Listing 3 shows what the NoTransform class is.
I Like the YUI Minifier; Can I Use That?
The nice thing about the way bundling and minification was implemented in ASP.NET MVC is that you don’t have to give up using utilities that you are currently using. The implementation works very much like the way IDependencyResolver works. In Version 3, an inversion of control container adapter was added to abstract away the details of any specific IoC container from the framework. The bundling and minification process illustrated here works very much the same way. The process begins with creating a custom instance of IbundlerTransform, as shown in Listing 4.
To take advantage of the YUICompressor Transform Class, the code in Listing 2 that loads the proper transformer must be changed to the following:
bool isDebug;
#if DEBUG isDebug = true; #endif
if (isDebug) { jstransformer = new NoTransform("text/javascript"); csstransformer = new NoTransform("text/css"); } else { jstransformer = new YUITransform(contentType.javascript); csstransformer = new YUITransform(contentType.css); }
I changed the debug-checking process slightly, because I am gradually moving to a solution that is testable. The next step involves creating a custom abstraction over the base Bundle Class that begins to abstract away the details of which files to add. I’ll leave that exercise to you to explore.
File Ordering within a Bundle
By default, JavaScript files are first ordered alphabetically within a bundle. Then, the files are restacked around known libraries. For example, jQuery - related files occur first in the bundle. Within the jQuery group, the files are sorted alphabetically. For CSS files, the files are first sorted alphabetically. Then, if the files reset.css or normalize.css exist, that content appears at the top of the bundled CSS file. Figure 6 illustrates this behavior in the bundled CSS file. Like everything else, this behavior is completely customizable. The Bundle Class has an Orderer property that conforms to the IBundleOrderer interface.
Click for a larger version of this image.

Figure 6: The Bundle.Orderer Property controls how files are ordered within the bundle.

Conclusion
With each release, the ASP.NET MVC Framework gets better and better. Bundling and minification is an essential process that needs to be in every production Web app that relies on significant JavaScript and CSS resources. Out of the box, the functionality is pretty good. There are, however, some missing pieces. Fortunately, the process was designed with customization and extensibility in mind. With a little effort, it was easy to toggle minification based on whether or not the application was being run under debug mode.
One final point, this article was based on beta software. The usual disclaimer applies - this functionality may change when the product is released to manufacturing (RTM).
John V. Petersen
&

SPONSORED SIDEBAR: Learn ASP.NET MVC in a Day!

ASP.NET is one of the world’s most popular Web development environments. We can help you with all ASP.NET projects as well as related technologies, such as HTML (4 and 5), JavaScript, jQuery, CSS, AJAX, services, and many more. (Learn more from www.codemag.com/consulting.)
That’s why CODE Training is offering a full day of training in ASP.NET MVC from CODE Consultants, experts in Web development. CODE Training and EPS Software will be holding an intensive one-day lecture, June 5, 2012, on ASP.NET MVC specifically designed for developers of business applications. Learn how, when and why to use ASP.NET MVC for the best result in your projects. Only $399!
Visit www.codemag.com/training to find out a little bit more about the class, or send an e-mail to info@codemag.com for more information.


Listing 1: Custom bundler class
using System;using System.Linq;using System.Web.Optimization;
namespace MVC4BundleUI{ public class MyBundler { public static void init() { IBundleTransform jstransformer; IBundleTransform csstransformer;
#if DEBUGjstransformer = new NoTransform("text/javascript"); csstransformer = new NoTransform("text/css"); #else jstransformer = new JsMinify(); csstransformer = new CssMinify(); #endif
var bundle = new Bundle("~/Scripts/js", jstransformer);
bundle.AddFile("~/Scripts/jquery-1.6.2.js", true); bundle.AddFile("~/Scripts/jquery-ui-1.8.11.js", true); bundle.AddFile("~/Scripts/jquery.validate.unobtrusive.js", true); bundle.AddFile("~/Scripts/jquery.unobtrusive-ajax.js", true); bundle.AddFile("~/Scripts/jquery.validate.js", true); bundle.AddFile("~/Scripts/modernizr-2.0.6-development-only.js", true); bundle.AddFile("~/Scripts/AjaxLogin.js", true); bundle.AddFile("~/Scripts/knockout-2.0.0.debug.js", true);
BundleTable.Bundles.Add(bundle);
bundle = new Bundle("~/Content/css", csstransformer);
bundle.AddFile("~/Content/site.css", true);
BundleTable.Bundles.Add(bundle);
bundle = new Bundle("~/Content/themes/base/css", csstransformer);
bundle.AddFile("~/Content/themes/base/jquery.ui.core.css", true); bundle.AddFile("~/Content/themes/base/jquery.ui.resizable.css", true); bundle.AddFile("~/Content/themes/base/jquery.ui.selectable.css",true); bundle.AddFile("~/Content/themes/base/jquery.ui.accordion.css",true); bundle.AddFile("~/Content/themes/base/jquery.ui.autocomplete.css",true); bundle.AddFile("~/Content/themes/base/jquery.ui.autocomplete.css", true); bundle.AddFile("~/Content/themes/base/jquery.ui.dialog.css",true); bundle.AddFile("~/Content/themes/base/jquery.ui.slider.css", true); bundle.AddFile("~/Content/themes/base/jquery.ui.tabs.css", true); bundle.AddFile("~/Content/themes/base/jquery.ui.datepicker.css",true); bundle.AddFile("~/Content/themes/base/jquery.ui.progressbar.css",true); bundle.AddFile("~/Content/themes/base/jquery.ui.theme.css", true);
BundleTable.Bundles.Add(bundle); } }
}

Listing 2: Simplied custom bundler code using the AddDirectory() method
public class MyBundler { public static void init() { IBundleTransform jstransformer; IBundleTransform csstransformer;
#if DEBUGjstransformer = new NoTransform("text/javascript"); csstransformer = new NoTransform("text/css"); #else jstransformer = new JsMinify(); csstransformer = new CssMinify(); #endif
var bundle = new Bundle("~/Scripts/js", jstransformer); bundle.AddDirectory("~/Scripts/","*.js",true, true); BundleTable.Bundles.Add(bundle);
bundle = new Bundle("~/Content/css", csstransformer); bundle.AddDirectory("~/Content/", "*.css", true, true);
BundleTable.Bundles.Add(bundle); } }

Listing 3: NoTransform transformation Class
public class NoTransform : IBundleTransform { readonly string _contentType;
public NoTransform(string contentType) { this._contentType = contentType; }
public void Process(BundleContext context, BundleResponse response) { response.ContentType = this._contentType; } }

Listing 4: YUI Compressor transformation class
using System.IO;using System.Web.Optimization;using Yahoo.Yui.Compressor;
namespace Bundler.Utilities{ public enum contentType { javascript, css }
public class YUITransform : IBundleTransform { readonly string _contentType = string.Empty;
public YUITransform(contentType contentType) { if (contentType == contentType.css) { this._contentType = "text/css"; } else { this._contentType = "text/javascript"; } }
public void Process(BundleContext context, BundleResponse bundle) { bundle.ContentType = this._contentType;
string content = string.Empty;
foreach (FileInfo file in bundle.Files) {
using (StreamReader fileReader = new StreamReader(file.FullName)) { content += fileReader.ReadToEnd(); fileReader.Close(); }
}
bundle.Content = Compress(content); }
string Compress(string content) { if (_contentType == "text/javascript") { return JavaScriptCompressor.Compress(content); } else { return CssCompressor.Compress(content, CssCompressionType.StockYuiCompressor); } } }}

9/24/2012

Scott Hanselman - Back to Basics: Dynamic Image Generation, ASP.NET Controllers, Routing, IHttpHandlers, and runAllManagedModulesForAllRequests


Warning, this is long but full of info. Read it all.
Often folks want to dynamically generate stuff with ASP.NET. The want to dynamically generate PDFs, GIFs, PNGs, CSVs, and lots more. It's easy to do this, but there's a few things to be aware of if you want to keep things as simple and scalable as possible.
You need to think about the whole pipeline as any HTTP request comes in. The goal is to have just the minimum number of things run to do the job effectively and securely, but you also need to think about "who sees the URL and when."
A timeline representation of the ASP.NET pipeline

This diagram isn't meant to be exhaustive, but rather give a general sense of when things happen.
Modules can see any request if they are plugged into the pipeline. There are native modules written in C++ and managed modules written in .NET. Managed modules are run anytime a URL ends up being processed by ASP.NET or if "RAMMFAR" is turned on.
RAMMFAR means "runAllManagedModulesForAllRequests" and refers to this optional setting in your web.config.
<system.webServer>

  <modules runAllManagedModulesForAllRequests="true" />

</system.webServer>
You want to avoid having this option turned on if your configuration and architecture can handle it. This does exactly what it says. All managed modules will run for all requests. That means *.* folks. PNGs, PDFs, everything including static files ends up getting seen by ASP.NET and the full pipeline. If you can let IIS handle a request before ASP.NET sees it, that's better.
Remember that the key to scaling is to do as little as possible. You can certainly make a foo.aspx in ASP.NET Web Forms page and have it dynamically generate a graphic, but there's some non-zero amount of overhead involved in the creation of the page and its lifecycle. You can make a MyImageController in ASP.NET MVC but there's some overhead in the Routing that chopped up the URL and decided to route it to the Controller. You can create just an HttpHandler or ashx. The result in all these cases is that an image gets generated but if you can get in and get out as fast as you can it'll be better for everyone. You can route the HttpHandler with ASP.NET Routing or plug it into web.config directly.

Works But...Dynamic Images with RAMMFAR and ASP.NET MVC

A customer wrote me who was using ASP.NET Routing (which is an HttpModule) and a custom routing handler to generate images like this:
routes.Add(new Route("images/mvcproducts/{ProductName}/default.png", 

                new CustomPNGRouteHandler()));
Then they have a IRouteHandler that just delegates to an HttpHandler anyway:
public class CustomPNGRouteHandler : IRouteHandler

{

    public System.Web.IHttpHandler GetHttpHandler(RequestContext requestContext)

    {

        return new CustomPNGHandler(requestContext);

    }

}
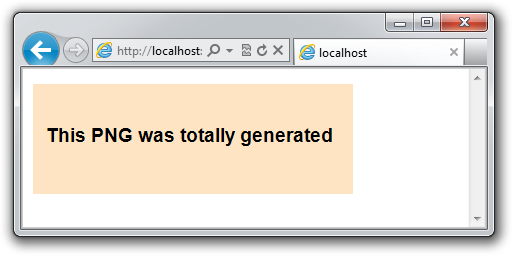
Note the {ProductName} route data in the route there. The customer wants to be able to put anything in that bit. if I visit http://localhost:9999/images/mvcproducts/myproductname/default.png I see this image...
A dynamically generated PNG from ASP.NET Routing, routed to an IHttpHandler
Generated from this simple HttpHandler:
public class CustomPNGHandler : IHttpHandler

{

    public bool IsReusable { get { return false; } }

    protected RequestContext RequestContext { get; set; }


    public CustomPNGHandler():base(){}


    public CustomPNGHandler(RequestContext requestContext) 

    { 

        this.RequestContext = requestContext; 

    }


    public void ProcessRequest(HttpContext context)

    {

        using (var rectangleFont = new Font("Arial", 14, FontStyle.Bold))

        using (var bitmap = new Bitmap(320, 110, PixelFormat.Format24bppRgb))

        using (var g = Graphics.FromImage(bitmap))

        {

            g.SmoothingMode = SmoothingMode.AntiAlias;

            var backgroundColor = Color.Bisque;

            g.Clear(backgroundColor);

            g.DrawString("This PNG was totally generated", rectangleFont, SystemBrushes.WindowText, new PointF(10, 40));

            context.Response.ContentType = "image/png";

            bitmap.Save(context.Response.OutputStream, ImageFormat.Png);

        }

    }

}
The benefits of using MVC is that handler is integrated into your routing table. The bad thing is that doing this simple thing requires RAMMFAR to be on. Every module sees every request now so you can generate your graphic. Did you want that side effect? The bold is to make you pay attention, not scare you. But you do need to know what changes you're making that might affect the whole application pipeline.
(As an aside, if you're a big site doing dynamic images, you really should have your images on their own cookieless subdomain in the cloud somewhere with lots of caching, but that's another article).
So routing to an HttpHandler (or an MVC Controller) is an OK solution but it's worth exploring to see if there's an easier way that would involve fewer moving parts. In this case the they really want the file to have the extension *.png rather than *.aspx (page) or *.ashx (handler) as it they believe it affects their image's SEO in Google Image search.

Better: Custom HttpHandlers

Remember that HttpHandlers are targeted to a specific path, file or wildcard and HttpModules are always watching. Why not use an HttpHandler directly and plug it in at the web.config level and set runAllManagedModulesForAllRequests="false"?
<system.webServer>

  <handlers>

    <add name="pngs" verb="*" path="images/handlerproducts/*/default.png" 

        type="DynamicPNGs.CustomPNGHandler, DynamicPNGs" preCondition="managedHandler"/>

  </handlers>

  <modules runAllManagedModulesForAllRequests="false" />

</system.webServer> 
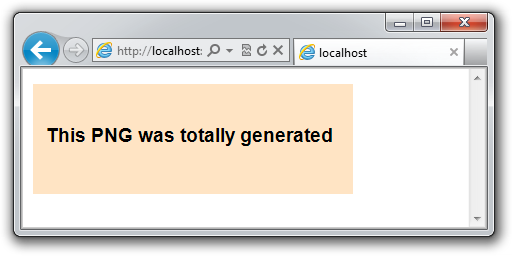
Note how I have a * there in part of the URL? Let's try hitting http://localhost:37865/images/handlerproducts/myproductname/default.png. It still works.
A dynamically generated PNG from an ASP.NET IHttpHandler
This lets us not only completely bypass the managed ASP.NET Routing system but also remove RAMMFAR so fewer modules are involved for other requests. By default, managed modules will only run for requests that ended up mapped to the managed pipeline and that's almost always requests with an extension. You may need to be aware of routing if you have a "greedy route" that might try to get ahold of your URL. You might want an IgnoreRoute. You also need to be aware of modules earlier in the process that have a greedy BeginRequest.
The customer could setup ASP.NET and IIS to route request for *.png to ASP.NET, but why not be as specific as possible so that the minimum number of requests is routed through the managed pipeline? Don't do more work than you need to.

What about extensionless URLs?

Getting extensionless URLs working on IIS6 was tricky before and lots of been written on it. Early on in IIS6 and ASP.NET MVC you'd map everything *.* to managed code. ASP.NET Routing used to require RAMFARR set to true until the Extensionless URL feature was created.
Extentionless URLs support was added in this KB http://support.microsoft.com/kb/980368 and ships with ASP.NET MVC 4. If you have ASP.NET MVC 4, you have Extentionless URLs on your development machine. But your server may not. You may need to install this hotfix, or turn on RAMMFAR. I would rather you install the update than turn on RAMMFAR if you can avoid it. The Run All Modules options is really a wildcard mapping.
Extensionless URLs exists so you can have URLs like /home/about and not /home/about.aspx. It exists to get URLs without extensions to be seen be the managed pipelines while URLs with extensions are not seen any differently. The performance benefits of Extensionless URLs over RAMMFAR are significant.
If you have static files like CSS, JS and PNG files you really want those to be handled by IIS (and HTTP.SYS) for speed. Don't let your static files get mapped to ASP.NET if you can avoid it.

Conclusion

When you're considering any solution within the ASP.NET stack (or "One ASP.NET" as I like to call it)...
The complete ASP.NET stack with MVC, Web Pages, Web Forms and more called out in a stack of boxes
...remember that it's things like IHttpHandler that sit at the bottom and serve one request (everything comes from IHttpHandler) while it's IHttpModule that's always watching and can see every request.
In other words, and HttpHandler sees the ExecuteRequestHandler event which is just one event in the pipeline, while HttpModules can see every event they subscribe to.
HttpHandlers and Modules are at the bottom of the stack
I hope this helps!